The Sleeping Loft was a great idea that Dietmar Lorenz, our project architect, suggested as DSA developed the design details. However, later, when we encountered plan check (an interesting process that I will describe in more detail in a future chapter), our plan checker did not like the stair access from the guest bedroom to the loft, nor the sleeping loft concept. He believed it was dangerous, that someone could get hurt.
The compromise was to label the room an attic loft on the plans, and to provide access through pull down stairs that are in the corridor outside the guest bedroom and bathroom (see the first set of pictures here).


When the stairs are extended they intrude into the hallway, but there is still room to walk around them. We also sacrificed a closet, but we gained closet space in the guest bedroom.
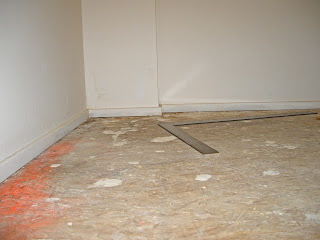
The attic has 2 deep bale windows, and the west and north bale walls are finished like the rest of the house, as are the south loft and east interior walls, but the builder left the floor unfinished (it's an attic) and we have used it as a somewhat awkward attic as we've settled in. Nevertheless, I've continued to be intrigued with the potential for this room, wanted to do something, and just wasn't sure what or how.
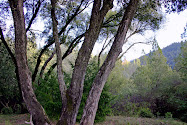
The room is interesting, very secluded from the rest of the house yet with windows and views into it. The bale window on the west wall outlines a lush green Douglas Fir; the bale window on the north wall frames the view across the front drive to one of my favorite oak trees and the garden area. My camera (or my photographic skill) doesn't do these windows justice -- the light isn't this harsh and the room isn't this dark -- but here are some pictures that give you some idea of how interesting this is.


The east wall of the room has a spy window, a twin to a spy window in the pop-up (quilt room). This interior window allows anyone in the room to spy into the gallery, directly across to the quilt room through the other window, and down into the stairwell/living room.

 Which also means that whoever is in the guest bedroom needs to be comfortable with whoever is staying in the sleeping loft, but then that was the case with our plan before the plan checker interfered. This is overflow sleeping for times when we have several people staying here, not a place to live.
Before Labor Day weekend, the room had an ugly, dirty-plywood, unfinished floor, and was full of, well, storage that someone else would call junk perhaps. It was junk we wanted to keep, but cluttered and disorganized -- things we stashed there. I had a vision of what this room could be -- notice there is no floor in this picture, it's a picture I took after I changed the room because it illustrates my plan -- and the more I thought about this, the more I wanted to do something.

While I've lived here (about 20 months now), I kept thinking about solutions. I considered buying an inexpensive large indoor/outdoor carpet, but the room dimensions are awkward (a long rectangle, with a cutout for the stairs). I thought of buying several remnant carpets. Of cutting them up. None of this was appealing. And so I wouldn't think about it for a while.
Then I started thinking about carpet tiles, investigated them on the web, and I had my solution, if I was brave enough to do this. (I'm not confident about my handyman skills.)

The Flor tiles I purchased are just under 20 inches square.
- First step was figuring out how many tiles to order. I needed a plan for how I would lay them out. I used spreadsheet software to map out the floor (made the cells into squares and assigned each a dimension of 2 inches) and decided on a checkerboard design
- I ordered the tiles -- including a few more than I needed.
- I downloaded the instructions, which was particularly good because I needed to buy or borrow a few things -- a carpet knife, something to mark the floor, and a 24 inch carpenter's square. I was a bit intimidated, but the instructions were clear.
- I cleaned the floor several times to get it as dust and debris free as possible.
- The first step was to establish the center of the room. The instructions said to measure from opposite corners and mark the floor. Where these lines intersect is the center.
- Then you draw lines through this center to the center of each wall, and that establishes your grid.
- The layout begins at the middle -- I created a T that went between the north and south walls and over to the west wall. (The pull down stairs opening is on the east side.)
- Once I was comfortable with the carpet tile grid, I trimmed the tiles at the ends of the T, a little tricky with uneven bale walls, and then attached them to each other using the Flor spots.
- I then filled in the NW and SW corner sections before heading east toward that last wall with the interesting deviations.
It was somewhat tricky, but not as difficult as I expected. I didn't attempt to keep the checkerboard going along the bale wall, and that seemed fine considering the tile was framing the opening for the stairs.
The unexpectedly difficult corner was the junction of the south loft wall and the east house wall. Since these were not bale walls, I thought this would be easier. But I had overlooked the little jog in the wall that goes around a support beam, and then it wasn't exactly straight (the tile layout is sensitive to about 1/8 inch).
 Again I deviated by using more of the charcoal tiles versus staying with the checker board pattern, and I'm happy with the result.
The final picture -- here is our sleeping loft today. It's a very nice room. The disadvantage is the pull down stair access. But particularly when I was a kid, I would have loved staying in this room, and I like just being in it today.
Print Page


where did you get the loft retractable stairs?
ReplyDeleteThe stairs are "Prestige" and they were recommended by our architect. Here is a link to their website:
ReplyDeletehttp://www.rainbowatticstair.com/attic-stairs-products/prestige-folding-attic-stairs.cfm