October 19, 2009

Chapter 5: The Straw Bale Decision

After Dan Smith mentioned straw bale construction, which was a logical approach to meet our design aspirations and goals, we did a little research and further thinking:
  • Visited a straw bale building, the Presentation Center, in Los Gatos
  • Researched straw bale construction on the web and read a book
  • Considered the Advantages and Limitations
In this chapter, I'll tell you about what we learned, and describe some results -- what it is like living in a straw bale house today.

The Presentation Center
The Presentation Center LEED Certified welcome center and dining hall is a straw bale building designed by DSA.  It is part of a 67 acre facility in the redwood forest of the Santa Cruz Mountains, just west of Los Gatos, California.  The center offers meeting and dining space for up to 200 people. The setting creates a retreat; it's a nonprofit ministry of the Sisters of the Presentation. 

While I don't think we knew it then, we essentially made the straw bale decision that hot August Saturday.  The welcome center sits in the blazing sun, on a hilltop, with no shade, yet when we entered the building, we changed climates. The cool interior reminded me of old adobe buildings I'd toured in my childhood and brought back that sense of awe at being inside these special places surrounded by deep walls. Even the outside sunshine seemed softer now and more welcoming.


Our guide was proud of the center's accomplishment, and also praised DSA. She particularly mentioned how great Dan Smith had been to work with – so calm, thoughtful, attentive, and a great listener to their needs, wants, and concerns.

The center has two features that we liked but later during design abandoned.  One of these is a living roof.


In this picture it was newly planted; it would be interesting to see it now.  During design we realized that this type of roof didn't make sense for us because our roof is not visible except by air (plane or helicopter), and this type of roof is more expensive and requires some maintenance.  If our location and needs were different, I still think they are very interesting.


The other feature was their beautiful hot water collectors.


The copper tubes inside glass were lovely and were used as shade as well. When we saw them we thought we would do this as well.  Yet they weren't practical for our design, and they were quite expensive, so this was an early cost trade-off. 


Our Further Research
We found some information on the web, but not as much as you can find today, and much was centered on a do-it-yourself approach, which we weren't interested in. 

Most of our research came from reading a book that is still in publication today, The Straw Bale House, Steen, Steen, Bainbridge & Eisenberg.  My sister gave me the book when I mentioned straw bale – she has a log home with solar and wind power (off grid). As I look back on this journey, I realize that my sister's earlier adoption of these technologies fueled my interest and gave me confidence that they could work. 

In particular, the book has a photo section in the middle, and I looked at these pictures again and again both back in 2005 and while we built the house.  In fact I used various sections of the book as reference for various stages we went through.  It explained some things that initially seemed obscure to me, like:
  • 3 string versus 2 string bales
    (relates to size and the width of the walls; we used 2 string, 18” bales, and our walls are about 22” thick after you add the lath and plaster). 
  • How walls, doors, and windows are managed
  • plastering and types of plaster – a section that I kept reading
  • An introduction to straw bale culture, and notably the concept of a truth window

Telling the Truth
When we visited the presentation center, our guide proudly showed us their truth window.  A truth window is a framed, glass-covered gap in the interior plaster that allows you to see the straw – essentially proving that you are telling the truth about your straw bale construction. I found this a bit corny in this first encounter, but the idea grew on me. 

If someone asked me to explain why people do this, well, it seems to me that part of the attraction to putting in a truth window is because owners and builders of straw bale buildings can.  Imagine what a window into the innards of a stick built house would look like?  It is fun to show off our truth window to visitors, and it feels right to me that it is there.


Straw Bale Advantages and Disadvantages
In our first meeting with DSA (which I'll describe in Chapter 6), we discovered that straw bale construction is generally more expensive, unless you do it yourself. 

The bales are essentially free. We bought ours directly from a rice farmer in California's Central Valley – paying only for the transportation costs for removal of a waste product.  Nicely environmental! 

The expense is due to the expertise, materials, and skill to build the walls -- post and beam construction, fitting the bales into the walls (compressing them), lath to support the plaster, and  complex plaster rendering.  This decision also limited our selection of potential builders. 

In our web research, we found two cost advantages mentioned: (a) the do-it-yourself approach, wherein the authors claim this is an inexpensive way to build a house, and (b) various statistics about how much you will save over time on heating and cooling your home. 

What I didn't see was the advantage of the aura of a straw bale building, which remained with both of us long after our visit to the Presentation Center. I think only excessive cost would have turned us away because of that feeling, that distinctive atmosphere from being within those thick walls, looking out through those deep windows, and feeling that calm climate within the building.  Being inside a straw bale building captured our minds. Although we didn't rewrite our goals, in essence a straw bale home had been added to the list.  


Results 

First statistically --
I've been recording outside temperatures since December 2007, and started recording inside temperatures in May 2008.  Here is a graph (fahrenheit) that depicts the average monthly variation between May 2008 and September 2009. Our house is peach color (darker outside, lighter inside) and so it seemed obvious to color our zone peach. 


Key:
Blues show outside fahrenheit temperatures below the house temperature.
Reds show outside fahrenheit temperatures above the house temperature.
Peach shows the range in fahrenheit temperature within the house.
The dotted line boxes show when the heat pumps are active – we use a geothermal system to heat our floors in winter.  Last year we turned these on in mid December and off in early April by setting the thermostat to 55 degrees fahrenheit.

Notes:
  • The graph is set up from January to December, so it overlaps to show figures for May 2008 through September 2009.
  • The monthly averages hide the peaks and valleys:
    We've had 6 days at 100+ fahrenheit outside – mostly in 2008.  For these peaks the house high was 80-81 fahrenheit.
    Temperatures rarely drop below 30 fahrenheit outside.  The house doesn't want to go below 60.  We had a particularly bad storm the first month we were here, temperatures plunged and we were without power for 20 hours.  The house still didn't drop below 60. 
Impressionistically --
This straw bale house is extremely solid and seems to create its own environment.  It is like a peach colored cave, with many windows that look out into a beautiful green forest, with constantly changing patterns of light and cloud, moon/stars, sun/rain, occasional snow.  It is always changing outside, but fairly consistent inside. 

There are no drafts in winter.  Even with wind outside well above 70 mph**, inside there was no air movement or whistling noise.  If we didn't have windows, we wouldn't know what was going on outside. 

It is especially surprising in times of change (fall, spring), because no heater air or noise comes on or shuts down and nothing happens to remind us that it is now colder or warmer outside than inside, versus the many months of contrary expectations.  My peach cave is constant!

**The central valley wind was clocked at 70 mph and the wind at the top of the Sierras was 150 – we are halfway between the two.


September 21, 2009

Just Photos: Our Sleeping Loft

This Labor Day Holiday (first weekend in September 2009) I decided to finish our Sleeping Loft.

The Sleeping Loft was a great idea that Dietmar Lorenz, our project architect, suggested as DSA developed the design details. However, later, when we encountered plan check (an interesting process that I will describe in more detail in a future chapter), our plan checker did not like the stair access from the guest bedroom to the loft, nor the sleeping loft concept. He believed it was dangerous, that someone could get hurt.

The compromise was to label the room an attic loft on the plans, and to provide access through pull down stairs that are in the corridor outside the guest bedroom and bathroom (see the first set of pictures here).


When the stairs are extended they intrude into the hallway, but there is still room to walk around them. We also sacrificed a closet, but we gained closet space in the guest bedroom.

The attic has 2 deep bale windows, and the west and north bale walls are finished like the rest of the house, as are the south loft and east interior walls, but the builder left the floor unfinished (it's an attic) and we have used it as a somewhat awkward attic as we've settled in. Nevertheless, I've continued to be intrigued with the potential for this room, wanted to do something, and just wasn't sure what or how.

The room is interesting, very secluded from the rest of the house yet with windows and views into it. The bale window on the west wall outlines a lush green Douglas Fir; the bale window on the north wall frames the view across the front drive to one of my favorite oak trees and the garden area. My camera (or my photographic skill) doesn't do these windows justice -- the light isn't this harsh and the room isn't this dark -- but here are some pictures that give you some idea of how interesting this is.


The east wall of the room has a spy window, a twin to a spy window in the pop-up (quilt room). This interior window allows anyone in the room to spy into the gallery, directly across to the quilt room through the other window, and down into the stairwell/living room.


The south wall is the partial loft wall, with an open airy feeling.


Which also means that whoever is in the guest bedroom needs to be comfortable with whoever is staying in the sleeping loft, but then that was the case with our plan before the plan checker interfered. This is overflow sleeping for times when we have several people staying here, not a place to live.


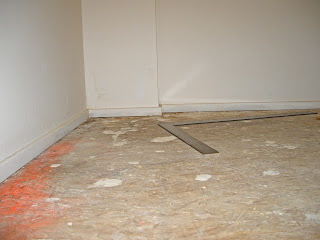
Before Labor Day weekend, the room had an ugly, dirty-plywood, unfinished floor, and was full of, well, storage that someone else would call junk perhaps. It was junk we wanted to keep, but cluttered and disorganized -- things we stashed there.  I had a vision of what this room could be -- notice there is no floor in this picture, it's a picture I took after I changed the room because it illustrates my plan -- and the more I thought about this, the more I wanted to do something.


While I've lived here (about 20 months now), I kept thinking about solutions. I considered buying an inexpensive large indoor/outdoor carpet, but the room dimensions are awkward (a long rectangle, with a cutout for the stairs). I thought of buying several remnant carpets. Of cutting them up. None of this was appealing. And so I wouldn't think about it for a while.

Then I started thinking about carpet tiles, investigated them on the web, and I had my solution, if I was brave enough to do this. (I'm not confident about my handyman skills.)


The Flor tiles I purchased are just under 20 inches square.
  1. First step was figuring out how many tiles to order. I needed a plan for how I would lay them out. I used spreadsheet software to map out the floor (made the cells into squares and assigned each a dimension of 2 inches) and decided on a checkerboard design
  2. I ordered the tiles -- including a few more than I needed.
  3. I downloaded the instructions, which was particularly good because I needed to buy or borrow a few things -- a carpet knife, something to mark the floor, and a 24 inch carpenter's square. I was a bit intimidated, but the instructions were clear.
  4. I cleaned the floor several times to get it as dust and debris free as possible.
The actual installation (after cleaning, assembling tools, and having a plan) took 2 afternoons.
  1. The first step was to establish the center of the room. The instructions said to measure from opposite corners and mark the floor. Where these lines intersect is the center.
  2. Then you draw lines through this center to the center of each wall, and that establishes your grid.
  3. The layout begins at the middle -- I created a T that went between the north and south walls and over to the west wall. (The pull down stairs opening is on the east side.)
  4. Once I was comfortable with the carpet tile grid, I trimmed the tiles at the ends of the T, a little tricky with uneven bale walls, and then attached them to each other using the Flor spots.
  5. I then filled in the NW and SW corner sections before heading east toward that last wall with the interesting deviations.
The part I was most worried about was the opening for the pull down stairs. I knew I would have to cut tile in odd shapes, and that the bale wall was particularly irregular there.


It was somewhat tricky, but not as difficult as I expected. I didn't attempt to keep the checkerboard going along the bale wall, and that seemed fine considering the tile was framing the opening for the stairs.


The unexpectedly difficult corner was the junction of the south loft wall and the east house wall. Since these were not bale walls, I thought this would be easier. But I had overlooked the little jog in the wall that goes around a support beam, and then it wasn't exactly straight (the tile layout is sensitive to about 1/8 inch).


Again I deviated by using more of the charcoal tiles versus staying with the checker board pattern, and I'm happy with the result.

Also I want to mention Homer-Kitty, who kept track of my activities and was the first one to sleep in the loft. However, he doesn't like cameras.


The final picture -- here is our sleeping loft today. It's a very nice room. The disadvantage is the pull down stair access. But particularly when I was a kid, I would have loved staying in this room, and I like just being in it today.


Print Page

September 4, 2009

Chapter 4 Aesthetics, Aspirations, Art, & Architectects: Finding DSA

What I believe now is that when you select an architect, you are choosing:
  • An artist whose work inspires you,
  • A partner you can work with, and
  • An expert who can bring new ideas, knowledge, possibilities, and solutions to you.
There is also a lot of solid hard work as part of this capability. I cannot imagine the effort, focus, and processes that turn dreams into realities and produce a complex building. A big part of this is the builder's work, and working with the builder as well. Nevertheless, at this point in our selection process we were assuming basic architect capability in anyone we would consider, and so the ideal architect seemed like a blend of artistic talent, technical expertise, and interpersonal style/skill. We found a perfect match with DSA (Dan Smith & Associates, Berkeley, CA).

As detailed in Chapter 3, we had completed our design aspirations. In addition we'd assembled a list of topics for phone interviews with potential architects, including:
  • Sharing our design aspirations and asking about their relevant experience.
  • Discussing the size (residential mid-size), scope (our fantasy budget), and timing.
  • Requesting samples of their work. (Many had websites, but we wanted to visit a site.)
  • Inquiring what they would gain from working with us. (Do our interests align well with their goals?).
  • Asking who would work on our project.
  • Seeking any information on costs.
We also had 4 key deciding factors:
  • Are they listening?
  • Do their responses inspire confidence that they have the capability we're seeking?
  • Do they seem to be thoughtfully looking for a good match?
  • Does it sound like our aspirations and interests will be important to them?
I had located 8 potential architects -- most seemed like a match to our interests (contemporary designs, energy independence); some were on the list because they were local. DSA was near the top of the list, and Dan Smith's responses in our phone interview created so much excitement that I didn't care if I talked to anyone else. Subsequent brief contact with others was not compelling.

Dan listens very well – during this first discussion and during our entire working relationship. The following are some core topics that we discussed in that first phone meeting on July 25, 2005; a meeting that jumped around and didn't exactly follow my script, yet exceeded my expectations. We talked for 0ver an hour, with growing enthusiasm on both sides.

Straw Bale Construction
Straw Bale Construction was featured on the DSA website and it was one of my first questions. We hadn't been thinking about a straw bale house; I'm not sure we had heard of them. Dan said that although they often design projects with other materials, they were featuring straw bale because it had been drawing a lot of interest.

Dan's firm is focused on a green approach, which means things like integrated photovoltaic (solar electric power), solar hot water systems, passive solar design for heating and cooling, minimized energy usage, and use of natural materials. Straw bale construction helps with efficiency (creates thermal mass) and uses natural material (a waste product from the production of rice), so it is an appealing construction material for a green design.

I'm sure you can imagine how this felt to me, since I had been arguing with our previous architect to simply consider what I called solar power, and here was Dan, throwing out terms such as photovoltaic (PV), and speaking authoritatively about various options. This contribution of new possibilities and ideas was to continue, and our resultant straw bale house incorporates things like a SIPS roof and geothermal power that we didn't know anything about before working with DSA.

Radiant Heat
Radiant Heat was one of our goals because both of us dislike the blowing hot dry air from the central forced air systems, and we also think it isn't healthy. We had been in houses with radiant floor heat, it felt very natural, and we were strongly interested -- it was in our goal statement.

Dan agreed that it is a superior heating solution, and also explained the critical relationship between design and insulation in making it more efficient and effective when also considering power needs.

He also brought forth the flip side of our temperature needs – cooling -- which is another advantage to straw bale because the thick bale walls add to the thermal mass. This means the house is resistant to temperature changes – easier to keep warm in winter and doesn't heat up quickly in summer. He said he had been designing straw bale houses without air conditioning, including one in California's hot Central Valley.

Money
While not a surprise, one challenge for us was that DSA expected to be paid hourly for their work, on a monthly basis, which meant that we needed to have these funds in place before any construction loan. Fortunately we had built up a reserve and we thought we'd be okay.

We also discussed construction costs, and this was less helpful. It is extremely difficult for an architect to predict costs to build – they're not in that business and, worse, they can't know what choices a client will make. The discussion made Dan nervous and he was careful to tell me that he couldn't predict. They can compare alternatives as we go through the design, and indicate which are more expensive, and thus help us include cost in our decision process.

As I mentioned, we started with something I'm now calling a fantasy budget. It was a range based on a little research about building costs and some hopeful thinking. We found it enormously difficult to get good cost information before we had a design. We eventually spent over 150% of the top of that range to build this house (ouch!) because (a) our budget was unrealistic, and (b) we made decisions, such as the geothermal system. I'll dedicate a future post to the geothermal system in particular, both technically and from a cost perspective. We debated about whether or not do this for agonizing months. It was our most radical decision.

Builder
Dan asked if we had identified a builder. He recommended that we involve a builder early in the process to get the builder's feedback during the design. This approach would mean contracting with that builder versus putting the plans out to bid, because the builder invests time and effort in helping with the design.

Green Architecture
DSA is particularly known for green architecture. When I talked with Dan they were in the finishing stages of a large dining hall at the Presentation Center in the Santa Cruz Mountains. This building has a living roof with an integrated PV system. It's a passive solar straw bale design and does not use air conditioning. They had just made it through a significant heat wave without a problem. Dan suggested that we visit them.

The Presenctation Center is LEED-Gold certified by the US Green Building Council. Dan asked if we were interested in LEED certification. While we probably had most of the same goals, I didn't see the advantage of a certificate. He said the certification process adds time and expense, which settled the question. (Our first example of a cost decision perhaps.)

Our Project and DSA
At that time Dan had over 20 years experience designing buildings and homes, and his practice was centered on green architecture. He was very interested in our design aspirations and goals, and felt that our project was a very good fit for his firm. This seemed obvious to me as he passionately described various green approaches. He was intrigued with the idea of doing a straw bale home with a modern design – most people who came to them for straw bale homes were interested in more traditional approaches. He was certain one of his project architects, Dietmar Lorenz, would love this challenge.

Next Steps
  1. We would visit the Presentation Center. (More about this in my next chapter.)

  2. We would send materials for review before a consultation meeting – the topographical survey, our design aspirations & goals, photos of the site, any articles or clippings we had of different houses or features that we liked. He encouraged us to send anything that appealed to us.

    One item I sent was a clipping from Sunset Magazine showing a bookshelf running up the side of a staircase. We're both readers, have a lot of books, and are always looking for places to put them.

    See the pictures here of our stairwell bookshelves! The picture on the left is looking down the stairs from the main floor, and the picture on the right is looking up those same stairs from the lower floor.


    Dietmar included these shelves in the plans. I hadn't known they made it (building a house is so complex; I couldn't track it all). Dietmar just doesn't lose the details!

  3. We scheduled a visit to their office in Berkeley August 17, for a consultation during which they would sketch some initial ideas.

  4. If all were agreed, Dan would write a contract after that session and they'd start to work.
I remember this first phone conversation so well because I emailed a summary to Ron. I couldn't describe how excited I was – didn't have the words. As I think back now, I guess it was like the anticipation at the start of a ride (roller coaster comes to mind), coupled with the relief and pleasure in finding someone who shined a light on our aspirations after what had seemed like a long time in darkness.

This roller coaster ride was going to increase in intensity over the following 30 months, gradually consuming all our free time.

More to come!

Print Page

August 23, 2009

Forest Living: The Praying Mantis Are Back!


One wonder we've enjoyed here is watching the Praying Mantis. We first noticed them in the summer 2007, before our house was complete. We'd see them hanging on door frames and eaves. Then later our adopted-stray Homer would crunch away on them, a handy snack! So far this year we've just seen a few small ones sedately moving around. Then this morning I saw my first large one.

Carnivores, the mantis prey on other bugs and even eat each other. I had thought their name was preying mantis for that reason, but they are named from the way they hold their front legs as if in prayer. Figures!

If you aren't too squeamish to watch a mouse being killed by one, there is an interesting, short video on You Tube. I think that this is a larger species than the ones here, but our cats will attest that the forests here are a rich mouse environment -- the food is plentiful. Click on this link for the You Tube Praying Mantis Versus Mouse video.

The Amador Master Gardeners classify them in the middle between the insects you want and those you don't. Issue is that they will eat any insect, even the beneficial ones. We tend to leave them alone (we excluding our incorrigible cats in this case).


Here's one a year or so ago, eating a yellow jacket. The mantis is on top of a yellow jacket trap – we were having trouble with a couple of nests that were positioned over our lower level sliding doors, and appreciated the help!


When I saw my first good-sized one this season, it was sitting on a Fragrant Cloud rose blossom -- green on red -- I had to grab my camera! The weather here has been odd, mid-70s and overcast, which meant good light conditions for a picture. But there was also a strong breeze, so getting a detailed shot was challenging -- you can't quite see the details of those compound eyes on that scary triangular head, which can circle around to track you almost as if detached.


The mantis was aware of me. They have great eyesight. It didn't leave or threaten me, but it shifted its head as I moved and always seemed to be looking right at me. Then while I was messing around and trying to use my telephoto to get close without getting close, a small flying insect flew around the rose and with a swift angular unfolding movement, the mantis legs flew out and clasped the insect inside those incredible front legs. Wikipedia calls these legs raptorial, which brings forth Jurassic Park images in my mind. I'm happy it is so small (or I am so big)!

Maybe you can see its bug meal if you compare the following 2 shots. After it captured the insect, the mantis just froze there (waiting for me to leave?), and when I look closely, I can see that it is holding something black/brown within those grasping, spiked legs!


The first time I searched the internet for information about the Praying Mantis, my curiosity was focused on their protective coloration. These two are from last fall – when a large Praying Mantis seemed to hang out for several days on top of a large Peace rose, looking pretty-much the same color as the rose.


If you're interested in more, check out wikipedia for information and pictures about various Praying Mantis species -- Wikipedia Praying Mantis.

Print Page

August 17, 2009

Chapter 3: Aesthetics, Aspirations, Art, & Architects: Preparation

Being fired by our architect was a good thing -- it made us stop and think and do some research. I found a guide to selecting an architect on the AIA website. ( I've tried to find the same guide to reference here, but everything has changed -- there are many guides with somewhat different messages.)

Here is what we did, and admittedly, I interpreted and didn't completely follow the AIA guide (not a surprise to those who know me!). We assembled the following information, and then embarked on our search for an architect. In Chapter 4 I'll tell you about that search, this is the preparation. I don't know if it would work for everyone, but it definitely worked well for us.

Design Aspirations
This was the most important thing we did at this stage. The lack of this simple yet hard-to-compose list was central to the debates and disagreements not only with our first architect, but with each other.

We didn't have a definition for what design aspirations were supposed to be, but they seemed somewhat fuzzily clear. Like, we ought to be able to come up with this. And so we did.

To start, we separately worked on our lists, and I remember staring at empty space for a while as I let the thoughts come. These initial lists were like brainstorms – we didn't try to focus on the wording.

Once we had each created a list, we met at our dining room table and shared the elements on our list, and why these were important to us. There was a lot of overlap, sometimes said differently, and there were also some slightly different key elements in each list. Not necessarily things we differed on, but a difference in how important some things were. Understanding these things about how we each saw this was very good to do at this stage, and was continually helpful during the ensuing design and build processes.

Our merged and polished design aspirations were:
  • Aesthetically different, not just a box in a forest.
  • Energy independence. All electric. Don't even want propane.
  • Take advantage of the setting in the trees, the forest and canyon views, and use clean lines and smart design to blend into the setting, lots of windows to blur the lines between inside and outside. Build within the trees and remove as few trees as possible.
  • Very open feeling within the house and between the house and the outside, but also the ability to close off areas. I like to be able to shut the door on the kitchen when I want to, and yet not feel isolated in there if I don't want to.
  • Use of interesting materials – doesn't mean expensive – can be artistic use of industrial if it also fits the setting, colors, and style. Like the idea of using concrete and metal.
Primary Building Goals
  • Create a principal residence (not a vacation place)
  • Energy independence including active and passive approaches to solve for our energy needs
  • Radiant heat (extremely important -- noise, comfort, and health)
  • 2500-2800 square feet (prefer smaller end of that range)
Property Description
  • ~ 12 acres, wooded and hilly, on a gravel road
  • 11 GPM well, septic system, on the grid
  • gravel driveway access to building site
  • 200 sq. foot cabin with bathroom, at end of driveway, want to retain as future workshop
Known Limitations
  • Limited level space
  • Current septic tank located at widest area in driveway
  • Access to cabin needs to remain after construction (can't block driveway without putting in new driveway)
  • Build around/within the trees – in particular there is a glade area with large, old trees immediately adjacent to where we want to build – the trees stay
Ideal Features
  • High ceilings, walls for hanging art, bookshelves
  • Ceiling fans
  • Indirect lighting, sky lights
  • Pocket doors
  • Vehicle turnaround space, extra parking
Concerns or Questions
  • Wood stove(s)?
  • Future fence location
  • Exits from floors
  • Trade-offs – know we need to make decisions (can't have everything) and will need help
We also itemized the rooms we would like to have, any unusual furniture or electronic requirements, and the room sizes in our current house as well as which ones seemed like good sizes and which ones were too large or small. After some false starts and learning, we were ready to move forward again with new hope.

Looking back on this list today, I realize we got it all. Here are some shots of our house from the east side, showing some of those aesthetics, and taken about 2 weeks ago. :-)


Print Page

August 9, 2009

Chapter 2: Where Do You Put The Garage?

Switching back to the past (after my last post of weekend photos) ---

It's Fall '99, we own the property, and we think we're ready to consider some designs. We knew some of what we wanted:
  • an architectural design – to get that edge in form, function, aesthetics
  • modern or contemporary architecture – the clean lines, the utilitarian approaches, letting the actual materials show through
  • to produce our own energy – expected to use a solar power solution as well as passive design -- hadn't thought about how much we would produce versus buy
  • to preserve the forest, its character, and particularly the magnificent trees
We independently reviewed some contemporary style architecture books and compared our opinions. We walked around the property and seriously considered 3 locations for the house.

We found information about 3 local architects, didn't like one, one wasn't interested, and we met with the other one. (As you are probably thinking, this was not a good process for selecting an architect. And you're right, but we learned quite a bit with this approach -- learning we needed more than we realized!)

The morning we were to meet with the architect, we were excited and tense. Ron was pacing and I couldn't eat. But nothing prepared us for his first words, which he repeated over and over -- Where do you put the garage?

He paced across our property near the potential building sites, and he didn't see a solution. We were dismayed and confused. He identified myriad difficulties, such as building a garage floor overhanging the hillside or building it under the house resulting in a high rise, or blocking access to the cabin (which we had planned to keep).

Yet -- he suggested we look at some of his houses, and we toured several over the next few weeks. The owners of the houses praised their working relationship with him; they were clearly pleased. The houses were solid and we didn't see anything wrong, although they were larger, seemed to have some wasted space in my opinion, and nothing really drew us to his work (but then they weren't contemporary designs). Bottom line -- despite his misgivings about the garage issue, and our lack of excitement about his work, we were all willing to try some designs. I think we were thankful he was willing to work with us. We loaned our annotated architecture books and agreed to his hourly rate (very reasonable) and we were off!

We met with him every few months – primarily because Ron and I were working long hours. We'd take a long weekend to visit the area, stay with my Dad, and meet with him for a couple of hours. Those early meetings were quite exciting and fun as we debated various alternatives. We also completed some work at the property -- cleared some brush, widened the driveway, and arranged for a topographical survey, this latter item providing some answers about those slopes.

Over time I began to worry because we had repeated debates with him about solar power. He pushed us to reconsider, saying he didn't understand why we wanted it and that he wasn't sure it was that effective. In retrospect, I think he wasn't comfortable working with the technology.

Another issue was size. We were a part of that issue, but every time he drew a floor plan (several) the house increased in size until it was over 3500 square feet. I don't think he knew how to push us on the trade-offs, or I'm not sure he heard us about the size (we were expecting 2500 square feet).

We limped along this way for a little over 3 years, which sounds long now but it probably only included 10 sessions with him. It was a very slow pay-as-you-go progress that we were making. We still didn't know when we could afford to build, so this seemed fine.

Then a couple of crises intervened – my Dad's declining health and some financial setbacks caused us to put this work on hold. My Dad died in early 2004. Although he had seen us buy a place near him, and he knew we would build there someday, it is an additional sadness that he never saw our place, and there are so many things about it today that he would appreciate.


So, now, let's move forward to 2005. Our finances have recovered, and we expected we'd be ready to break ground in 2006. We contacted the architect and he agreed to start working with us that spring. Then after delays and rescheduling, he wrote in June and regretfully fired us! Say what?

We were shocked, angry, and depressed -- this was a low point in creating this home. However, as we accepted his decision and reflected on our experience (no surprise to you I'm sure), we realized there was an obvious mismatch between his craft and our wants and somehow we had been so eager for progress that we didn't stop to think.

The time we spent working with him had achieved some benefits for us.
  • His arguments and questions, even about aspects that seemed most basic to us, helped refine our thinking.
  • We abandoned some ideas along the way and thereby became more focused on what we wanted.
As I look back today, I realize it is fortunate that he had the courage, self-awareness, and wisdom to end his work with us before we went further. This was a gift that we didn't appreciate at the time, but do now.

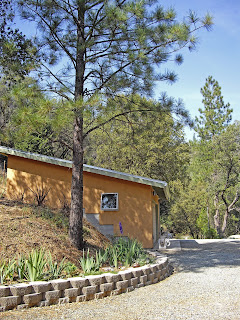
Where did we put the garage? There was some grading involved, and we had to remove a few young trees , but for us it didn't turn out to be a major design consideration.

Here are some shots from 2006, before we broke ground, and some taken today.

1) View from looking down the driveway from our house location today
These shots include the same Monterey Pine tree in the foreground. It has continued to thrive, and towers over the garage today. 2006 versus 2009; what a difference!


2) View coming up the driveway
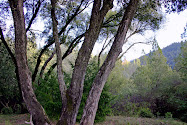
These next 2 show the garage from the other side, coming up the driveway. The multiple trunk oak tree towards the right is the same tree, still there today. You can also see the Monterey Pine further back -- behind the garage in our current picture.


3) Panoramic Shots Across from our House Location
Here are 2 panoramic shots, each produced in Photoshop Elements from a series of 3 pictures that the application pasted together.


Next post I'll describe the successful process we used to find an architect – part of the reason we live here today. It's a process that included so many important and complex facets and one of the quickest solved was where to put the garage. :-)

Print Page

Just Photos: Gardens, Cats

Sharing pictures from this weekend.

Behind the house (south side); the garden here is primarily roses, but a few petunias and others. We walk past these in the mornings and evenings when we're here, along with the dogs and often the cats -- we walk in the forest at dawn and in the evening.


One of my favorite roses is Fragrant Cloud. I bought my first one years ago in Morgan Hill, and it spent about 8 years in a pot. It survived the move here and is doing very well. This is a picture of a rose from my second bush -- I love this rose – great color, lots of blooms, and an intense scent. The other is right outside our bedroom window and sometimes I can smell the roses at night -- making it easy to stop and smell them. :-)


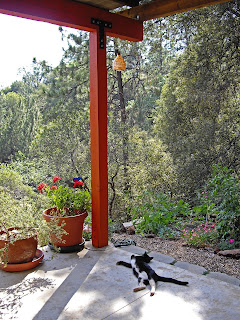
Behind the house again, SW corner garden -- and that cat is BCOS (Black Cloud Over Snow) -- he's taking advantage of the nice breeze to cool his tummy.


WYSIWYG (What-You-See-Is-What-You-Get), in the shade on that same porch.


Homer-Kitty in the driveway yesterday. He is the stray who showed up at our building site about two years ago. He is a superb rodent hunter -- has managed all my gopher problems. I attended a master gardener session yesterday morning and one question was about gophers. The response? The best solution is a cat.


A few shots from the upper garden, or orchard? Most of our fruit/nut trees are up there as well as blueberries, rhubarb, onions, tomatoes, cantaloupe, squash (several kinds), beets, cucumbers, corn, beans, peas, peppers. That sounds like a lot, but it isn't all producing. I was late getting it in and I'm learning a lot about gardening here this year. The onions have been great. The others are just coming in so we'll see.

Today I planted some carrots for the fall, as well as more beets. The garden is a long narrow bench above the garage. The trees are all very young -- new this year -- we have cherry, apricot, apple (3), peach (2), plum (2), nectarine, and walnut. The walnut and one of the apples are not in this garden -- they're behind the house.


That's what it looked like here this sunny late summer weekend. Weather here has been in the low eighties with a mild breeze. Almost feels like a touch of fall in the air, but I know we have many long summer days ahead of us.

Print Page